Types of Prototype Boards
There are different types of prototype boards that have their own strengths and weaknesses. Below are some examples of common prototype boards.:
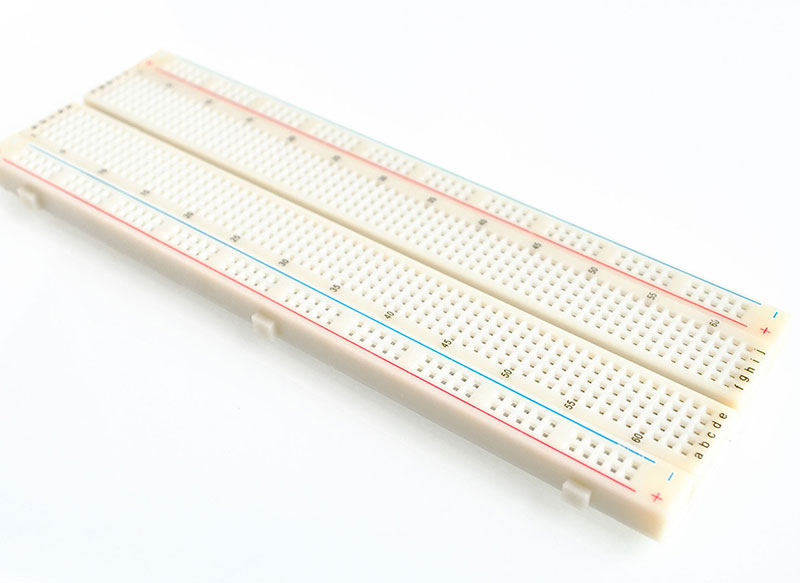
- Breadboards: Breadboards are the perfect platform to explore and experiment with circuit building - they provide a reliable canvas for electrical engineers, makers, hobbyists, educators, and students alike. They have a grid of holes that allow components to be inserted and connected without soldering. There are different sizes and colors of breadboards available.
- Stripboards: Stripboards are similar to breadboards, but they have copper strips instead of holes. Components are soldered onto the copper strips, and wires are used to connect the components. Stripboards are more permanent than breadboards, but they are also more difficult to modify.
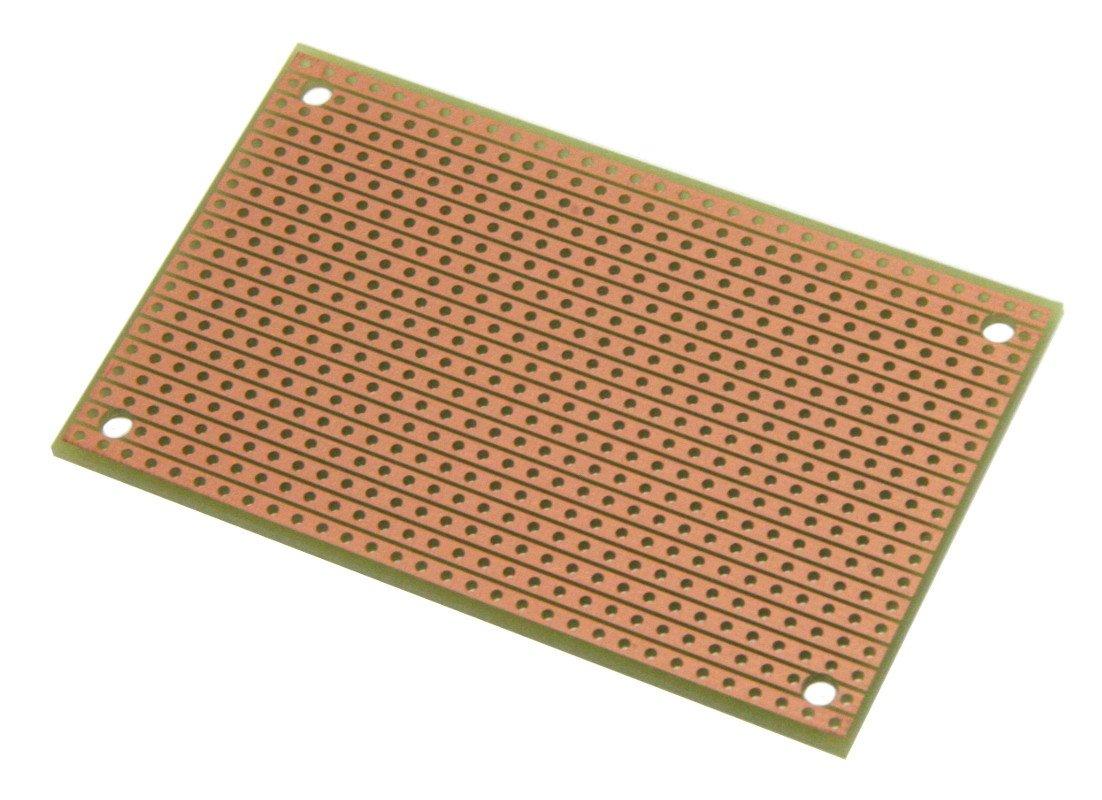
- Perfboards: Perfboards have a grid of holes like breadboards, but they do not have the pre-arranged connectivity of breadboards. Components are soldered onto the board, and wires are used to connect them. Perfboards are more permanent than breadboards, but they are also more flexible than stripboards.
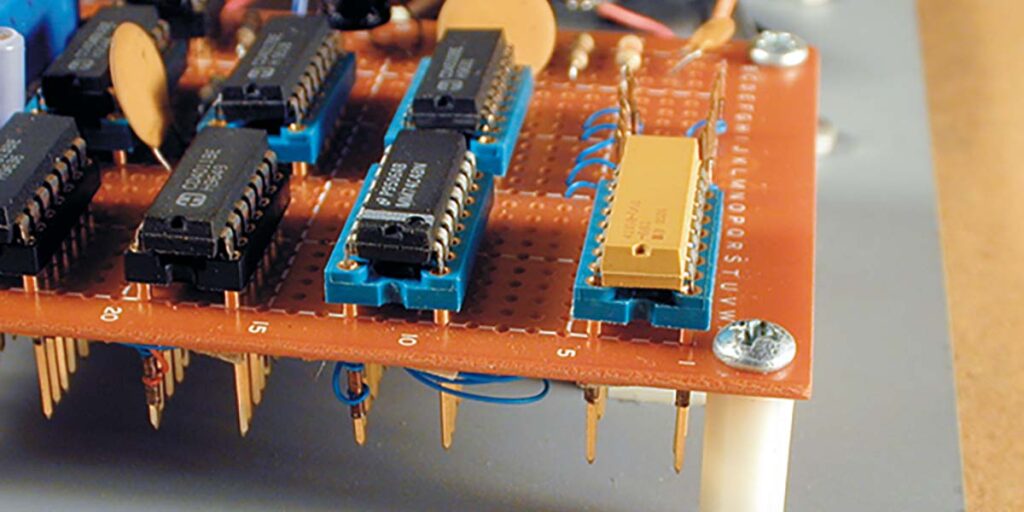
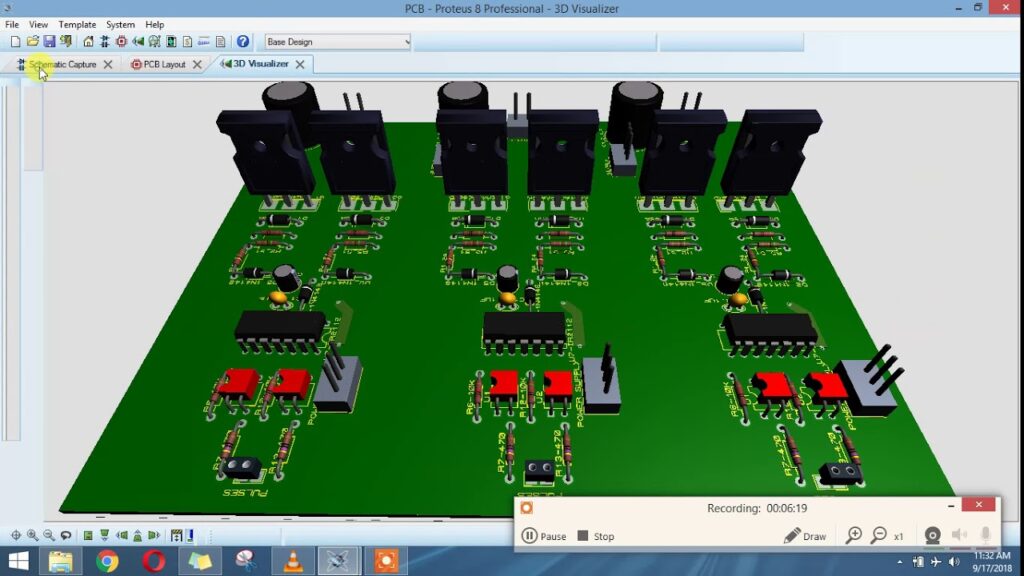
- PCB prototype boards: PCB (Printed Circuit Board) prototype boards are designed to look and function like production PCBs. But with the added flexibility of being able to modify and experiment with the circuit. They are made of a copper-clad board with a pre-designed circuit layout. Components are soldered onto the board, and traces are cut or modified to change the circuit.
- Wire-wrap boards: Wire-wrap boards use wire-wrapping technology to connect components instead of soldering. Wire-wrap boards have a grid of holes, and each hole is connected to a pin with a wire-wrap post. Wire-wrap boards are more durable and reliable than other prototype boards. But are also more expensive and require specialized tools and skills to use.
The choice of prototype board depends on the project's complexity, requirements, and personal preferences.
Components Used in Prototype Boards
Prototype boards incorporate both passive and active components, such as resistors, capacitors, inductors, transistors, diodes, ICs, and microcontrollers. These are frequently used on prototype boards.:
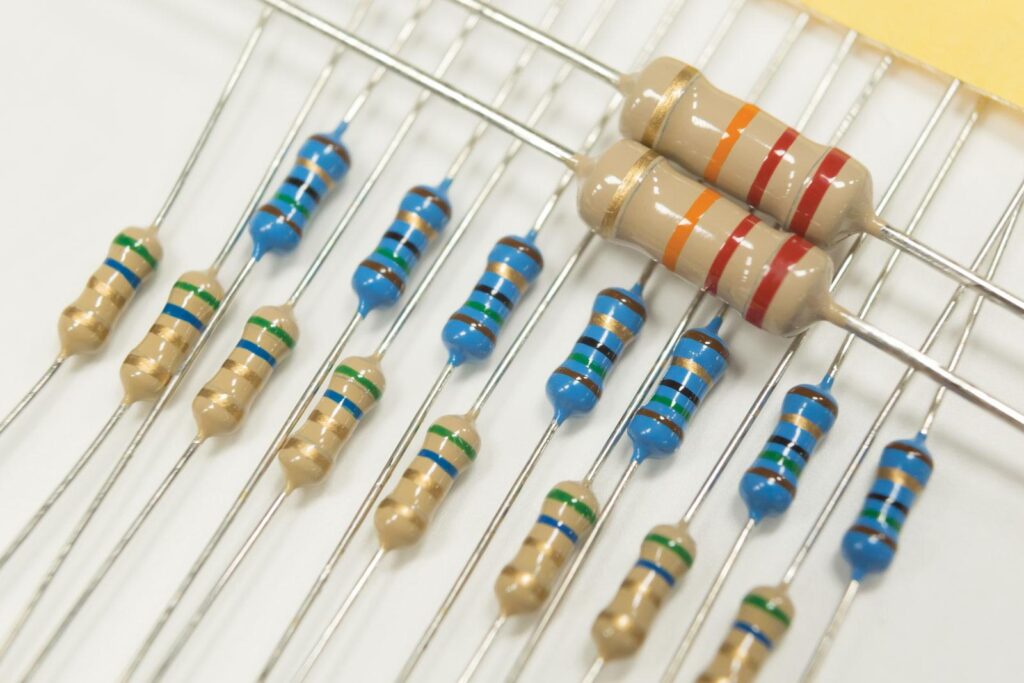
- Resistors: Resistors are used to control the flow of current in a circuit. Moreover, are often used to create voltage dividers, limit current flow, and bias transistor circuits.
- Capacitors: Capacitors store energy in an electric field. Because of that these are used for filtering, smoothing, and decoupling in power supplies and signal circuits.

- Inductors: Inductors store energy in a magnetic field. Often used for filtering and tuning in radio circuits and power supplies.
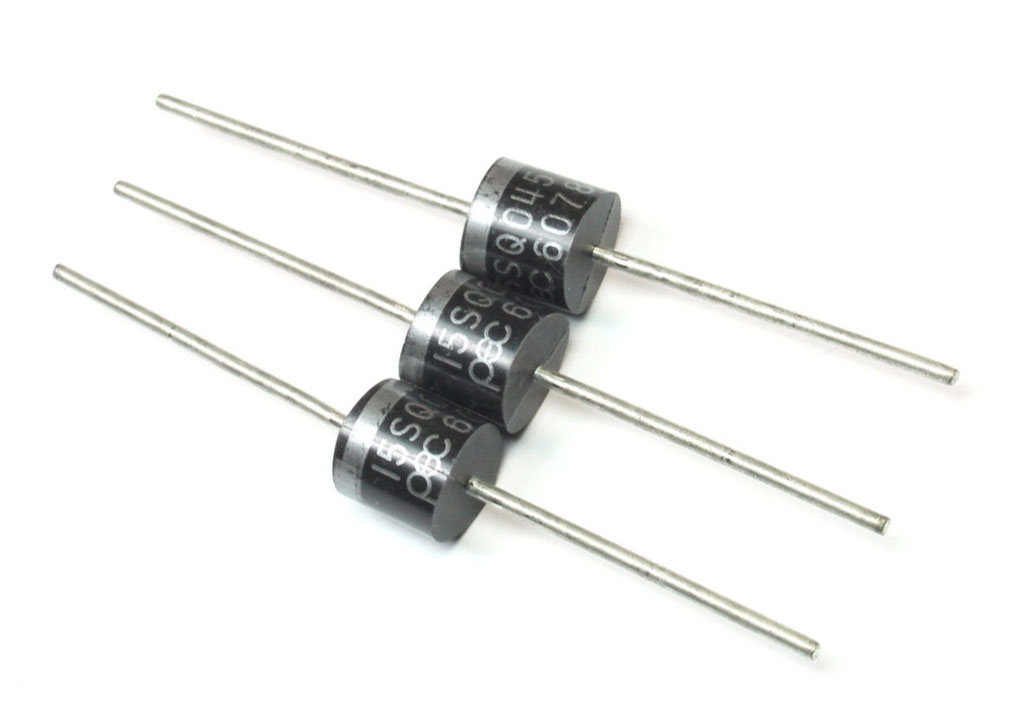
- Diodes: Diodes are marvelous components in electro-mechanical systems, performing the crucial job of only allowing electricity to move through a circuit one way. Moreover, they are often used for rectification, voltage regulation, and signal processing.
- Transistors: Active components called transistors can be utilized as either amplifiers or switches in electronic circuits. They are often used in power amplifiers, signal amplifiers, and switching circuits.
- ICs (Integrated Circuits): Integrated circuits (ICs) are circuits that consist of numerous transistors and other components. They are typically utilized in digital logic, signal processing, and microcontroller circuits.
- Microcontrollers: Microcontrollers are sophisticated integrated circuits with a CPU to manage data, memory for storing information and I/O ports enabling communication. These powerful devices can perform complex calculations in the blink of an eye!
Other components used in prototype boards include LEDs (Light Emitting Diodes), sensors, switches, and connectors. The choice of components depends on the specific requirements of the circuit being built.
Advantages and Disadvantages of Prototype Boards
Prototype boards have both advantages and disadvantages when compared to other methods of building electronic circuits. Here are some advantages of using prototype boards:
Advantages:
- Low cost: Prototype boards are a low-cost alternative for constructing and evaluating circuits, making them a budget-friendly option.
- Ease of use: Prototype boards do not require specialized tools or skills. They allow for quick and easy assembly of circuits.
- Quick testing: Prototype boards enable fast and easy testing of circuits, allowing designers to quickly identify and correct errors.
- Flexibility: Prototype boards can be modified and reused for other circuits, making them a flexible option for experimenting with different designs.
Disadvantages:
- Limited circuit complexity: For tasks requiring greater complexity, prototype boards may not be the ideal choice - with their capacity to handle small-to-medium-sized circuits only. Expert engineering is needed for larger and more intricate circuitry.
- Limited durability: Prototype boards are not as durable as finished PCBs and may become damaged or worn out over time.
- Limited reliability: Prototype boards may not be as reliable as finished PCBs and may require additional testing and debugging to ensure proper functioning.
- Difficulty scaling: Prototype boards may not be suitable for large-scale production and may require additional design work to be scaled up for mass production.
In summary, prototype boards are a useful tool for building and testing electronic circuits, offering low cost, ease of use, and quick testing. However, they are best suited for small to medium-sized circuits, and their limited durability and reliability may require additional testing and debugging.
Steps Involved in Creating a Prototype Board
- Design the circuit: To begin, you must create a circuit design either by hand or using eda software.
- Choose a prototype board: Once the circuit is designed, choose a prototype board that is appropriate for the circuit. Consider factors such as the size of the board, the type of components, and the complexity of the circuit.
- Gather components: Next, gather all the necessary components. This may involve purchasing components from a supplier or salvaging them from other electronics.
- Place components on the board: Once all the components are gathered, place them on the prototype board according to the circuit design.
- Connect components: After placing the components, connect them using wires or traces on the board. This involves soldering components onto the board or using a wire-wrap tool to connect them.
- Test the circuit: Once you have connected all the components, be sure to test the circuit to confirm that it is working properly. You can measure voltage, current, and signal levels using a multimeter or an oscilloscope.
- Troubleshoot issues: If the circuit does not work correctly, troubleshoot the issues by examining the circuit design and checking for incorrect connections or faulty components.
- Refine the design: Once the circuit is working correctly, refine the design as necessary. This may involve optimizing component placement, adjusting values of resistors and capacitors, or changing the circuit layout.
- Document the design: Finally, document the design by creating a schematic diagram and noting any modifications made to the original design. This documentation will be useful for future reference or for creating a final production-ready PCB.
These steps may vary depending on the specific requirements of the circuit being designed, but they provide a general overview of the process of creating a prototype board.
Guide for Designing a Prototype Board
Here are a few helpful tips to help you create a functional prototype board that meets your needs.
- Plan the circuit carefully: Take the time to carefully plan the circuit before starting the design. Consider the requirements of the circuit, such as power requirements, signal frequency, and component specifications.
- Choose the right board: Choose a prototype board that is appropriate for the circuit you are designing. When designing a circuit, it's essential to consider various conditions like board size, component count, and the overall complexity of your design.
- Use a schematic diagram: Create a schematic diagram of the circuit before starting the physical design. Visualizing the circuit will enable you to confirm that all the components are connected correctly.
- Group components logically: Group components together logically to make it easier to troubleshoot and modify the circuit if necessary.
- Minimize component placement errors: Minimize the chance of component placement errors by using a layout program to create the board design.
- Use trace routing: Use trace routing to connect components on the board. This involves routing traces between components to create electrical connections.
- Keep it neat: Keep the board neat and organized by using a consistent layout and labeling components. It'll be easier to diagnose any potential issues and make adjustments if required.
- Test the circuit: After designing the board, make sure to conduct a comprehensive circuit test to confirm the functioning. Check the voltage, current, and signal levels using a multimeter or oscilloscope.
- Document the design: Document the design by creating a bill of materials, a schematic diagram, and any other necessary documentation. This will be useful for future reference or for creating a final production-ready PCB.
Method of Using Prototype Board
Using prototype boards is an essential part of the electronic design process. Some best practices for using prototype boards are as follows:
- Plan ahead: Building a prototype board starts with careful planning. Taking the time upfront to consider your layout and design can help prevent any unexpected problems later on, ensuring that you create a successful product tailored to fit all of your specifications.
- Use high-quality components: To ensure the dependability and efficacy of your prototype board, be sure to incorporate only superior components. Anything less can lead to a subpar outcome or even complete failure of the board.
- Keep it neat: Keep your prototype board neat and organized to make it easier to work with and troubleshoot if issues arise.
- Test as you go: Test the board as you build it, rather than waiting until it is complete.
- Use proper tools and techniques: Use proper tools and techniques when working with your prototype board, such as using a soldering iron with the appropriate temperature and soldering technique. By connecting components properly, you can ensure that delicate board parts are not placed at risk of harm.
- Document changes: If you make any changes to the board or design during the building process, be sure to document them. This approach will ensure that you have a record of the changes and alterations made, making it more simple to recreate the design in due course.
- Consider EMI/EMC: If your circuit involves high-frequency signals or sensitive analog components, consider EMI/EMC (electromagnetic interference and compatibility) issues when designing and building your prototype board.
To ensure a smooth experience for your prototype board development, adhere to these best practices; they'll guarantee the reliability and functionality of the project while being straightforward in terms of troubleshooting.
Applications of Prototype Boards
Electronics and engineering are two fields that benefit greatly from prototype boards. These versatile tools can be used for a variety of purposes, such as:
- Circuit prototyping: Engineers and hobbyists alike utilize prototype boards to expeditiously examine novel circuit designs while also allowing them the ability to conveniently make necessary adjustments.
- Educational purposes: Prototype boards are often used in educational settings to teach students about circuit design and electronics. By leveraging their expertise, students can develop a fundamental understanding of how to construct circuits, recognize and repair issues when they arise, and comprehend the relationship between components.
- Research and development: Prototype boards are frequently used in research and development environments to quickly build and test new electronic devices and systems. They allow engineers to experiment with different circuit designs and configurations and can help accelerate the product development process.
- DIY projects: Prototype boards are the ideal tools for hobbyists and DIY aficionados looking to construct their own custom electronic devices. From audio amplifiers to LED lighting systems and even remote control inventions, these versatile circuit boards allow creators to bring their projects' dreams into reality!
- Testing and debugging: Prototype boards can be used to test and debug existing electronic systems. Engineers can use them to isolate problems in a circuit and make modifications to fix them.
- Temporary or small-scale projects: Prototype boards can be used for temporary or small-scale projects where a fully-customized printed circuit board (PCB) is not necessary. With this technique, you'll be able to save both time and money - especially if the project is not intended for mass production.
Prototype boards are important for engineers and electronics amateurs alike. They simplify designing, testing, and modifying electrical circuits.
Summary
Prototyping boards are indispensable for engineers, hobbyists, and students seeking to rapidly build and evaluate electronic circuitry. From prototype design to research & development, education, or DIY projects; they provide a varied array of outlets suitable for an extensive catalog of uses - all while adhering strictly to best-practice guidance such as organizing thoroughly beforehand, utilizing superior components, and testing regularly along the way! Doing so can guarantee that the end product is reliable in its functioning whilst being easily operated & repaired when necessary. Overall, prototype boards are a valuable resource for anyone involved in electronics and engineering, offering a flexible and efficient way to design and test electronic circuits.