Introduction
The Raspberry Pi is a tiny Inexpensive single-board PC (Personal Computer) Made by the Raspberry Pi Foundation. While it was initially Created as an educational tool, the Raspberry Pi is also Able of being used as a home media player and entertainment system. Audio playback is one of the most basic yet useful features of any media device. In this guide, we will go through various methods of how to play audio on the Raspberry Pi from basic wired and Bluetooth speaker connections to advanced hi-fi setups using specialised audio software.
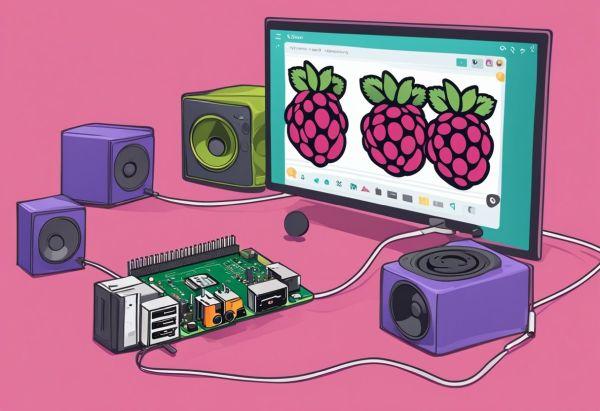
Connecting Wired Speakers
The Easy way to play audio on the Raspberry Pi is by Joining wired speakers directly to the board. All Raspberry Pi models have a 3.5mm audio jack that can be used to connect passive speakers, computer speakers, or audio setups. To connect wired speakers:
- Connect the 3.5mm audio cable from your speakers into the audio jack port Situated on the Raspberry Pi board. The audio jack is typically found near the edge of the board.
- Configure the audio output settings on your Raspberry Pi. By default, audio will be routed By the 3.5mm jack but you may need to allow it. Open Raspi-Config from the menu and select Audio Options to configure audio output.
- Play any audio file directly from the Raspberry Pi. You can use apps like VLC media player, omxplayer from the command line, or code a Python script to play audio. The sound will now output through the connected wired speakers.
- Adjust the volume using the speaker controls on your audio hardware or through the GUI volume settings on the Raspberry Pi desktop environment.
Get Free PCB Assembly
Connecting Bluetooth Speakers
If you have Bluetooth-enabled speakers, you can wirelessly stream audio from the Raspberry Pi. To connect Bluetooth speakers:
- Make sure your Bluetooth speaker is powered on and in pairing mode. Refer to the speaker manual for details on how to activate pairing or Bluetooth discovery.
- On the Raspberry Pi, click the Bluetooth icon in the top menu bar and select "Setup New Device" to initiate device scanning.
- Select your speaker from the list of found devices. If prompted, check that the Bluetooth passkey or PIN on the speaker matches the one shown on the Raspberry Pi screen.
- Once paired, the speaker will be connected and available for audio playback from the Raspberry Pi. The audio output can now be controlled remotely via the Bluetooth speaker controls.
- Play audio as before using VLC, omxplayer, or Python. The sound will stream wirelessly to the paired Bluetooth speaker.
Play Audio Files From The Raspberry Pi OS
The Raspberry Pi OS comes preinstalled with basic multimedia applications that can be used to play local audio files stored on the Raspberry Pi. Some common options include:
- VLC Media Player: A popular cross-platform media player. Use VLC to open audio files located on the Pi.
- Rhythmbox Music Player: A simple music library organiser and player for audio collection. Add folders containing music and create playlists.
- omxplayer: A command line video and music player. Useful for scripting playback. Run "omxplayer filename.mp3" to play a file.
- Amaze: A desktop audio player optimized for the Raspberry Pi. Browse the library and play folders/playlists of music.
- MPD/MPC: The Music Player Daemon lets you set up a music server. Remote control playback on other devices.
- To use any of these players, copy audio files like MP3s to your Raspberry Pi. Browse to the folder location and open files directly from the apps. Volume can be adjusted from the GUI or terminal for playback through connected speakers.
Command Line
In addition to GUI media players, audio can also be played from the Linux command line on Raspberry Pi. This allows for more control and scripting options when using the Pi in non-GUI modes or for automation. Some useful audio playback commands include:
- aplay filename.mp3 - Play an MP3 file using the Advanced Linux Sound Architecture (ALSA) driver.
- omxplayer filename.mp3 - Play using the OpenMAX framework optimized for multimedia.
- mpg123 filename.mp3 - Play using the mpg123 MP3 decoding library.
- mpc play - Connect to a local MPD music server and play music.
- ffmpeg -i input.mp3 output.wav - Convert audio formats.
- speaker-test -k noise - Test connected speaker hardware with pink noise.
- amixer set PCM 100% - Adjust PCM/analog output volume level.
Command line playback allows integration with scripts and controlling audio on headless Pi setups without needing X windows or desktop environments.
Using Python
The versatile Python programming language also has modules that make it simple to incorporate audio playback into Python scripts running on Raspberry Pi. Common audio playback modules include:
- pygame - Contains Sound objects to play WAV/OGG/MP3 files using SDL and works in GUI or non-GUI modes.
- Pydub - Manipulate audio using a high-level interface to commonly used audio processing libraries like FFmpeg.
- simple audio - Play simple WAV files with an easy to use interface.
- vlc - Control VLC playback through a Python API for advanced playback.
- Python Audio SDK - Low level interface to audio devices allowing control of sample rate, channels, encoding etc.
Python code can be written to playback single audio files, create playlists, stream audio over networks, and synchronise playback with other programs or inputs. Audio playback can also be triggered or controlled through REST APIs or web interfaces easily using Python.
Hi-Fi Audio On The Raspberry Pi
While the Raspberry Pi is capable of basic audio playback, for hi-fidelity music listening some modifications are recommended. The onboard audio circuitry is optimized more for multimedia than high quality audio. For serious Hi-Fi usage, a specialised Linux distribution called RuneAudio can be used to transform a Raspberry Pi into a dedicated digital music player.
RuneAudio is a pre-configured audio-focused operating system with optimizations for reducing noise,jitter and interruptions. It turns the Raspberry Pi into a network audio renderer/streamer supporting high resolution audio formats. RuneAudio comes bundled with the following audio software:
- RuneScript - Frontend web interface for music library management and playback control.
- RuneAudio - Daemon that handles audio decoding/processing, EQ settings and playback.
- Volumio - Open-source digital audio player platform focused on hifi playback.
- MPD - Versatile backend music server compatible with various remote control clients.
- Audio drivers - Includes optimized ALSA, PulseAudio and JACK audio drivers.
RuneAudio gets the most audio performance possible from the Raspberry Pi's hardware and is ideal for using it as a robust and affordable Hi-Fi music player on a home stereo system.
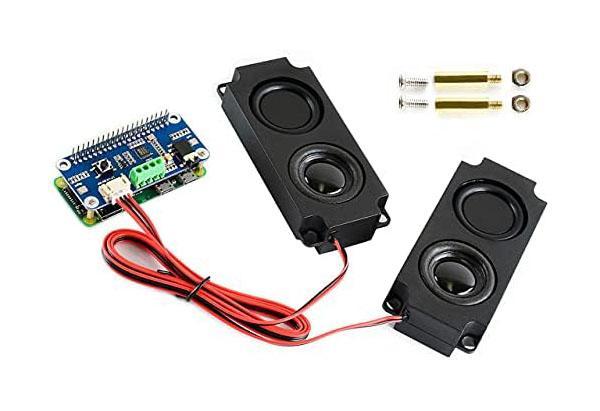
Audio Hardware Upgrades
While RuneAudio helps optimise audio performance through software configurations, some hardware upgrades can further enhance the listening experience when using a Raspberry Pi for hi-fi audio playback. External DACs, amplifier hats, and other addons improve various aspects of the audio signal such as sampling rates, bit depth, amplification for passive speakers, and connectivity options. This allows the Pi to drive higher impedance headphones or actively powered speakers with greater authority. Products like the HiFiBerry amplifier hats integrate a DAC and amplifier circuit tailored for audio. USB sound cards and DACs also introduce volume controls and balanced line outputs. Together, targeted Raspberry Pi hardware addons combined with specialised distros like RuneAudio offer an affordable way to build a high quality digital music streamer or home stereo system.
Get Free PCB Assembly
Acquiring RuneAudio
To utilize RuneAudio with a Raspberry Pi, download the disk image from the authority site at www.runeaudio.com. The disk image is optimized for the Raspberry Pi 4/3/2 boards.
- Download the latest RuneAudio disk image file (.img)
- Extract the .img file if compressed
- Copy the .img file to an inserted MicroSD card using dd on Linux/Mac
- Or use apps like Etcher or Win32DiskImager to “flash” the image file on Windows
- Insert the prepared MicroSD card into Raspberry Pi and power it on
- Connect an Ethernet cable for initial setup or connect over WiFi later
RuneAudio will now be installed and ready to configure for audio playback on the Raspberry Pi.
Setting Up The Raspberry Pi
Once RuneAudio is installed on the SD card and Raspberry Pi booted, perform initial network configuration:
- Connect the Pi to the local network using Ethernet port
- Find the IP address of Raspberry Pi in router's DHCP clients list
- Access the web admin interface by visiting the IP address in a web browser
- Log in with default credentials 'admin/admin'
- Click Network > Wired section to configure WiFi or static IP if needed
- Click System > Time & Date to set correct timezone
- Set a unique hostname for the Pi under System > Hostname
- Update RuneAudio system and restart services if prompted
Now the Raspberry Pi is ready to use as a networked music player over the local home WiFi network using RuneAudio.
RuneAudio
After initial setup is complete, the main RuneAudio web interface can be used at http://IP_address:4040 on any device. Here you can:
- Add music library folders by directory or network location
- Organise audio files by artist/album/track metadata
- Create playlists to group songs
- Stream music to other devices using DLNA/MPD protocols
- Configure advanced audio output settings like DSP, upsampling etc
- Control playback using built-in web interface
- Browse thousands of internet radio stations
- Install dozens of audio plugins and add-ons
Remotely access library from mobile apps
Overall, RuneAudio transforms the Raspberry Pi into a powerful and customizable whole-home music streaming solution capable of high-quality lossless audio playback.
Hardware Upgrades for Hi-Fi Audio
- Digital-to-Analog Converters (DACs): External USB DACs provide cleaner analog conversion with higher bit depths and sampling rates up to 32-bit/192kHz. This allows lossless playback of high-res audio files.
- Amplifier Hats: Add-on boards like the HiFiBerry Amp+ and JustBoom Amp integrate a headphone amplifier and audio DAC tailored for the Pi. They drive headphones/speakers directly from the board.
- USB Audio Interfaces: Devices like the FiiO E10K add line outputs, a headphone amplifier, and physical volume knob in addition to their audio DAC. Useful for powering demanding headphones.
- Sound Cards: Low cost USB sound cards like the Creative Sound Blaster Play! improve analog circuitry over the onboard audio. Some include optical/coaxial digital outputs.
- Digital Outputs: Connecting the Pi via HDMI or optical/coaxial to an AV receiver allows bit-perfect playback of multi-channel formats like Dolby Digital and DTS.
- Balanced Audio: Professional interfaces with XLR or TRS outputs provide balanced line-level audio for studio monitors or active PA speakers.
- Amplifiers: Pairing the Pi with a stereo integrated amplifier drives passive bookshelf or floor standing speakers for whole home audio.
Additional Considerations
- Hardware Decoding - Some Pi models like the 3B+ and 4 support hardware decoding of certain audio formats via the CEC audio processor. This offloads some decoding tasks from the CPU for improved performance.
- Amplification - For powered speakers, no amp is needed. But for passive speakers an external amp will be required between the Pi's audio out and speakers. The Official Pi Audio HAT adds an amplifier.
- Power Supply - Use a high quality power supply as insufficient power can cause audio glitches/distortion. The Official Pi Power Supply is recommended.
- File Formats - The Pi supports many formats out of the box like MP3, OGG, WAV but may require additional codecs for FLAC, ALAC or DSD. RuneAudio adds native support for hi-res formats.
- Digital Audio - The Pi has HDMI and S/PDIF outputs allowing it to connect to digital amps/receivers for the best quality sound reproduction.
- Low Latency - Distro like Volumio and RuneAudio minimise latency for smooth uninterrupted playback of bit-perfect audio.
- Network Sharing - Services like Samba, FTP or network shares on NAS devices let you stream your audio library to the Pi over the LAN.
- Internet Radio - Beyond local files, services like Pandora, TuneIn, Spotify Connect extend playback to online stations/playlists.
- Customizations - Tweaks to configuration files like ALSA, configs or firmware mods can improve various audio parameters like dynamic range.
Conclusion
In this article we have covered the different techniques for playing audio on the Raspberry Pi, ranging from basic speaker connections to advanced hi-fi configurations using specialised distributions like RuneAudio. Whether used as a simple stereo, wireless speaker, or whole-home music streaming system - the Raspberry Pi is a low cost yet powerful tiny computer perfectly suited for digital music playback and enjoyment. With options to control audio via its GUI, command line, or programming interfaces - the Pi is a versatile home audio player and entertainment solution.
You may also be interested in...
- How to turn a Raspberry pi into a Router
- How to install NOOBS on the Raspberry Pi
- Getting Started with ESP32
- Free PCB Assembly Offer is Now Live: Experience Reliable PCB Assembly from HQ NextPCB
- HQ NextPCB Introduces New PCB Gerber Viewer: HQDFM Online Lite Edition